.
The members working in and for a company are known as Employees.
.
This article will help you to understand how to use it.
.
Use case :
.
The Employee section will help you to know the details regarding employees.
.
How to Access Employees:
.
1. Go to Dashboard > Employees
2. You land on the Employee list overview page. Here you get to see the following features. Let us check them in detail.
.
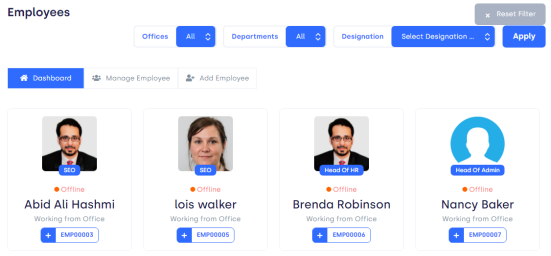
Figure 01,
.
Show Entries: It helps you to see the total number of Employees you want to be displayed on your overview page such as 10, 20, etc.
.
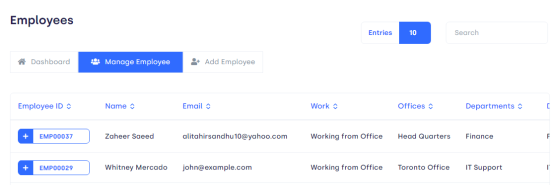
Manage Employees:
.
✔Click on Manage Employees, You will find the following overview page.
.
Overview page Taskbar shows you the following elements:
.
⮚Employee ID: An unique ID number of the Employee.
⮚Name The name of Employee.
⮚Email: The Email of Employee.
⮚Work: The Status of work such as work from the office or home.
⮚Offices: The branch where an Employee is working.
⮚Department: At which department an employee is working I.e Finance.
⮚Designation: what is the position of an Employee in the office?
⮚Date of Joining: The date when the job started.
.
Page Carousel: Helps to display the number of pages for the total number of employees it holds.
Search Console: To look for the employee using the name of the employee,or with the ID number of the employee.
.
.
.
Manage Details:
Click on the manage section, it will expand and give you 5 options:
.
✔Set Salary: You can set Employee Salary with the help of this bar.
✔Availabilities Set: It is like the Calendar that deals with availability details.
✔Set work schedule: You can set Work time here.
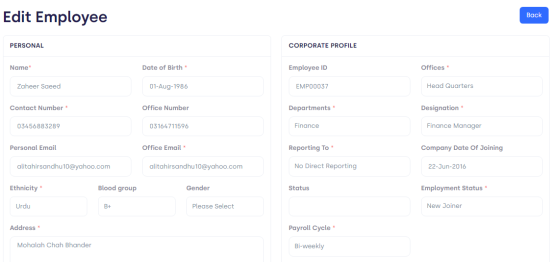
✔Edit: You Can Edit Employee Information from this section.
Click on the edit button, you will be displayed on the following page.
.
.
Figure 03, Insight to Edit Section
.
You can edit Employee Details from here, after that if you want to save that information, Click on update and information will be updated.
Delete: click on Delete button to delete the details.
.
How to Add Employees:
.
⮚Go to Dashboard>Employees>Add Employees.
⮚The Following card pops up.

Figure 04, insight to form
What is in the Form:
.
There are several sections that need to be filled with the following Information.
.
.
Personal:
.
❖Name: Add the name of the employee
❖Date of birth: Enter the date of birth.
❖Contact number: Enter contact details.
❖Office number: Add the Office number here.
❖Personal number: Enter the personal number of the employee.
❖Office email: Add office email.
❖Ethnicity: Enter the ethnicity of the employee.
❖Blood group: Add a blood group of employees.
❖Gender: Enter the gender of the employee.
❖Address: Add residential address here.
.
Corporate Profile:
.
⮚Employee ID: Enter Employee’s ID.
⮚Office: Select the concerned Office.
⮚Designation: Select the post of Employee.
⮚Department: Enter the concerned Department.
⮚Reporting to: Select to whom the employee is reporting.
⮚Date of joining: Enter the date of joining.
⮚Employment status: Enter the employment status such as replacement etc.
⮚Payroll cycle: Enter the payroll cycle such as weekly, or monthly.
.
Education:
⮚College/University: Add college details.
⮚Degree: Enter Degree Details.
⮚Field of study: Select the field of study.
⮚GPA: Enter total scored GPA.
⮚Date of completion: Add the date of degree Completion.
.
Employment :
.
⮚Employment type: Choose an Employment type such as full-time, or part-time.
⮚Salary type: Choose salary type I.e fixed salary.
⮚Other Benefits: Select other benefits like eligibility for bonuses, and loans.
.
Bank Account:
.
⮚Account holder name: Enter the account holder’s name.
⮚Account Number: Enter Employee’s account number.
⮚IBAN: Enter IBAN of Employee.
⮚Bank name: Add bank name.
⮚Bank identifier code: Enter bank identifier Code.
⮚Branch location: Enter branch location.
⮚Taxpayer ID: Add Taxpayer ID.
.
Identity :
.
⮚Type: Select an identity type such as a passport.
⮚Reference number: Enter the reference number.
⮚Issue date: Enter the issue date.
⮚Expiration date: Enter the expiry date.
.
Emergency Contact:
.
⮚Relationship: Add relation with Emergency Contact.
⮚Emergency email: Add Emergency email.
⮚Emergency number: Enter the Emergency number.
.
Family Contact:
.
⮚Relationship: Enter a relationship with a person.
⮚Contact no.: Add contact details.
⮚Email: Add the email of a family member.
.
Experience:
.
⮚Company: Add previous company name if any.
⮚Designation: Enter your position at the previous office.
⮚Duration: Enter duration in EX Company.
.
Documents:
.
.
The employee has to upload all the above documents.
If you want to save all the information, click on the save button, and your information is saved.
.
.
.
.
.
.
.
.
.
.
.
.
.
.
.
.
.
.
.
.
.
.
.
.
.
.
.
.
.
.
.
.
.
.
.