Work From Home
Use Case:
With the work-from-home concept getting popular after the pandemic, we found this feature to be inevitable. Let’s take a situation where you want to apply for work-from-home or want to see how many employees or which employees applied for work-from-home requests, then simply use this feature. The feature let you see the no. of requests with their status on this page.
How to Request for Work From Home:
1. Click on Requests> Work from Home.
2. You land on work from the home Overview page.
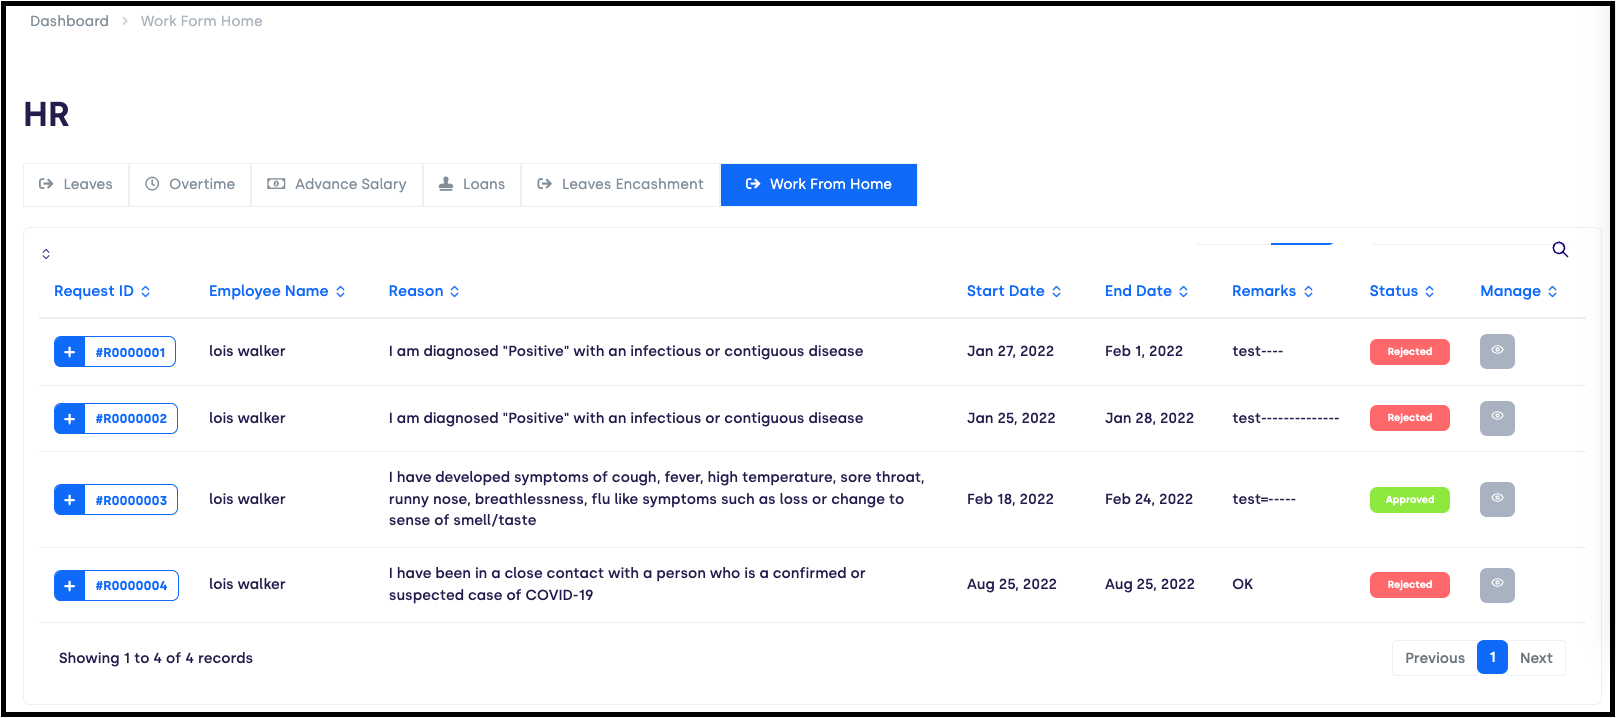
Elements available on the overview page:
- Request ID: A unique number assigned to individuals who raise a work-from-home request
- Employee Name: Name of the Employee who requested
- Reason: The reason for requesting work from home option
- Start Date: The date from which applicants work from home become effective
- End Date: The date on which applicants work from home become ineffective
- Remarks: Remarks added by the approver of the request
- Status: Whether the work-from-home request has been approved, canceled, or pending
Manage: You can edit your request from this bar. Like in the image below you can see how an existing request appears to all.

Page Carousel: Helps to display the number of pages for the total number of requests it holds.

Search Console: To look for the request using the tracking ID, and name of the concerned person.
Entries: Check the total number of entries on one page. You can set the entry limit to 10, 25, 50, and 100 per page.
How to Raise a New Request:
- Click on Create.
- The following card pops up.
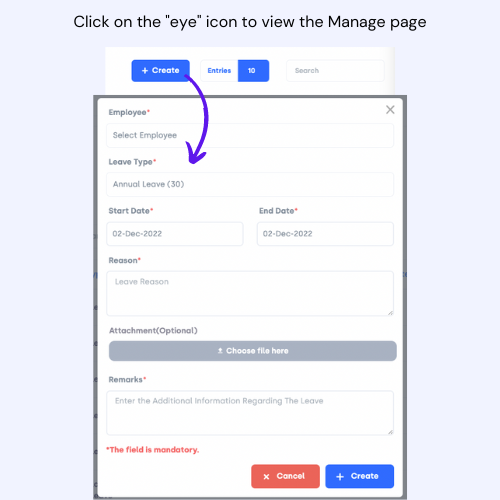
Fields in the form:
- Employee: Select the employee’s name
- Leave Type: Choose the leave type such as Sick leave, Paternity Leave
- Start Date: Enter the start date of your work-from-home request
- End Date: Enter the end date of the work-from-home request
- Reason: Select the reason to apply for work-from-home
- Attachment: Attach the document related to your request (if any)
- Remarks: Add additional information regarding the request
- Create: Click on the create button to save the request
- Cancel: Click on the Cancel button to discard the form