Shift Planner
Shift planner depicts employee Schedules, it helps to simplify the process of dealing with the immense workload and aids in creating an ideal shift work schedule.
Use Case:
Say, you are having trouble dealing with the workload, Shift planner will help you to create and manage a planner.
Let us see how we do it.
How to Access Shift Planners:
1. Go to Dashboard > Shift planner
2. You land on the Shift Planner overview page. Here you get to see the following features. Let us check them in detail.
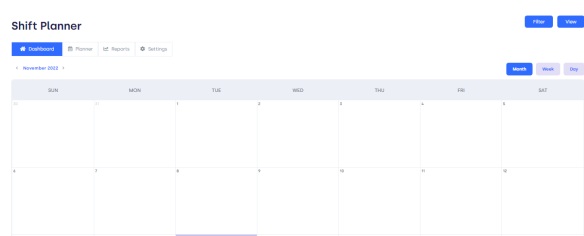
Figure,01
The above-displayed Calendar appears on the overview page, you can change planner mode with the effect of month week, and day and access previously added plans.
Adding Planner:
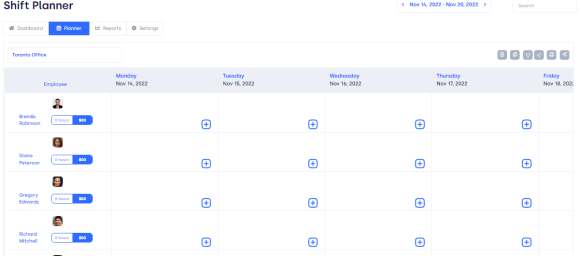
Figure 02,

Figure 03,
What is in the Form:
Create: Click on create button shift planner is created.
Cancel: Click on the cancel button to discard the information.
Search Carousel: To look for the planner using the official name, day, and date.
Figure 04,
Moreover, you can check and add new planners from the Date section, which gives access to all schedules.
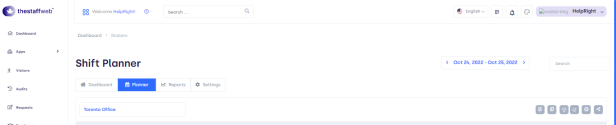
Figure05,
Furthermore, on this page, you will get different options like:
![]()
figure 06,
Reports:
The reports section will help in accessing the planner with the help of graphs regarding dates, days, and names.
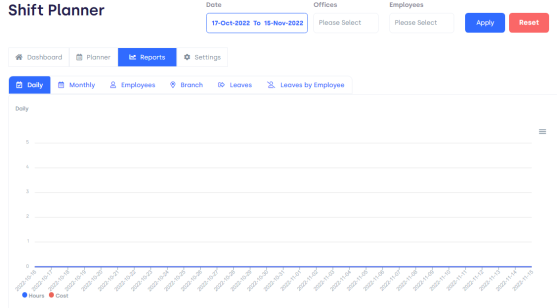
Figure 07,
The reports overview page has different options like:
You can also find reports regarding a particular employee of a company easily with just one click.

Figure 08,
It has three requirements:
Date: Enter a specific date regarding concerns.
Offices: Add concerned departments.
Employees: Enter Employee’s name.
Apply: Click on apply and the planner of a specific person will display.
Reset: Press reset to remove the added information.
Settings:
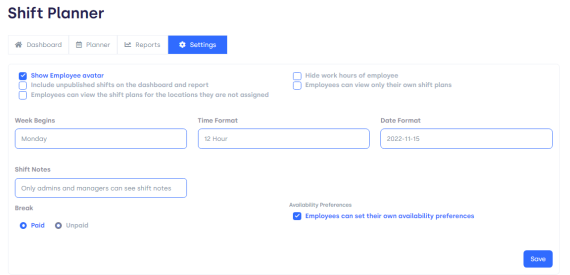
Figure 09,
What is in this Form:
The week begins: Select the day from which the week starts.
Time format: Select the time format as 12/24 hours.
Date format: You can select the date format from this bar.
Shift notes: You can set note preferences with this bar.
Break: paid /unpaid
Save: To save all the settings click on the save button and your settings are saved.